Try Organization Login Flow
Let's try organization login using a sample scenario.
Scenario
Guardio Insurance is an auto insurance service company with many employees using different credentials to sign in to many internal applications. To manage logins to its many applications, Guardio uses the WSO2 Identity Server B2B Private CIAM Solution, where Guardio is configured as a super organization. Guardio-SaaS-App is one such application.
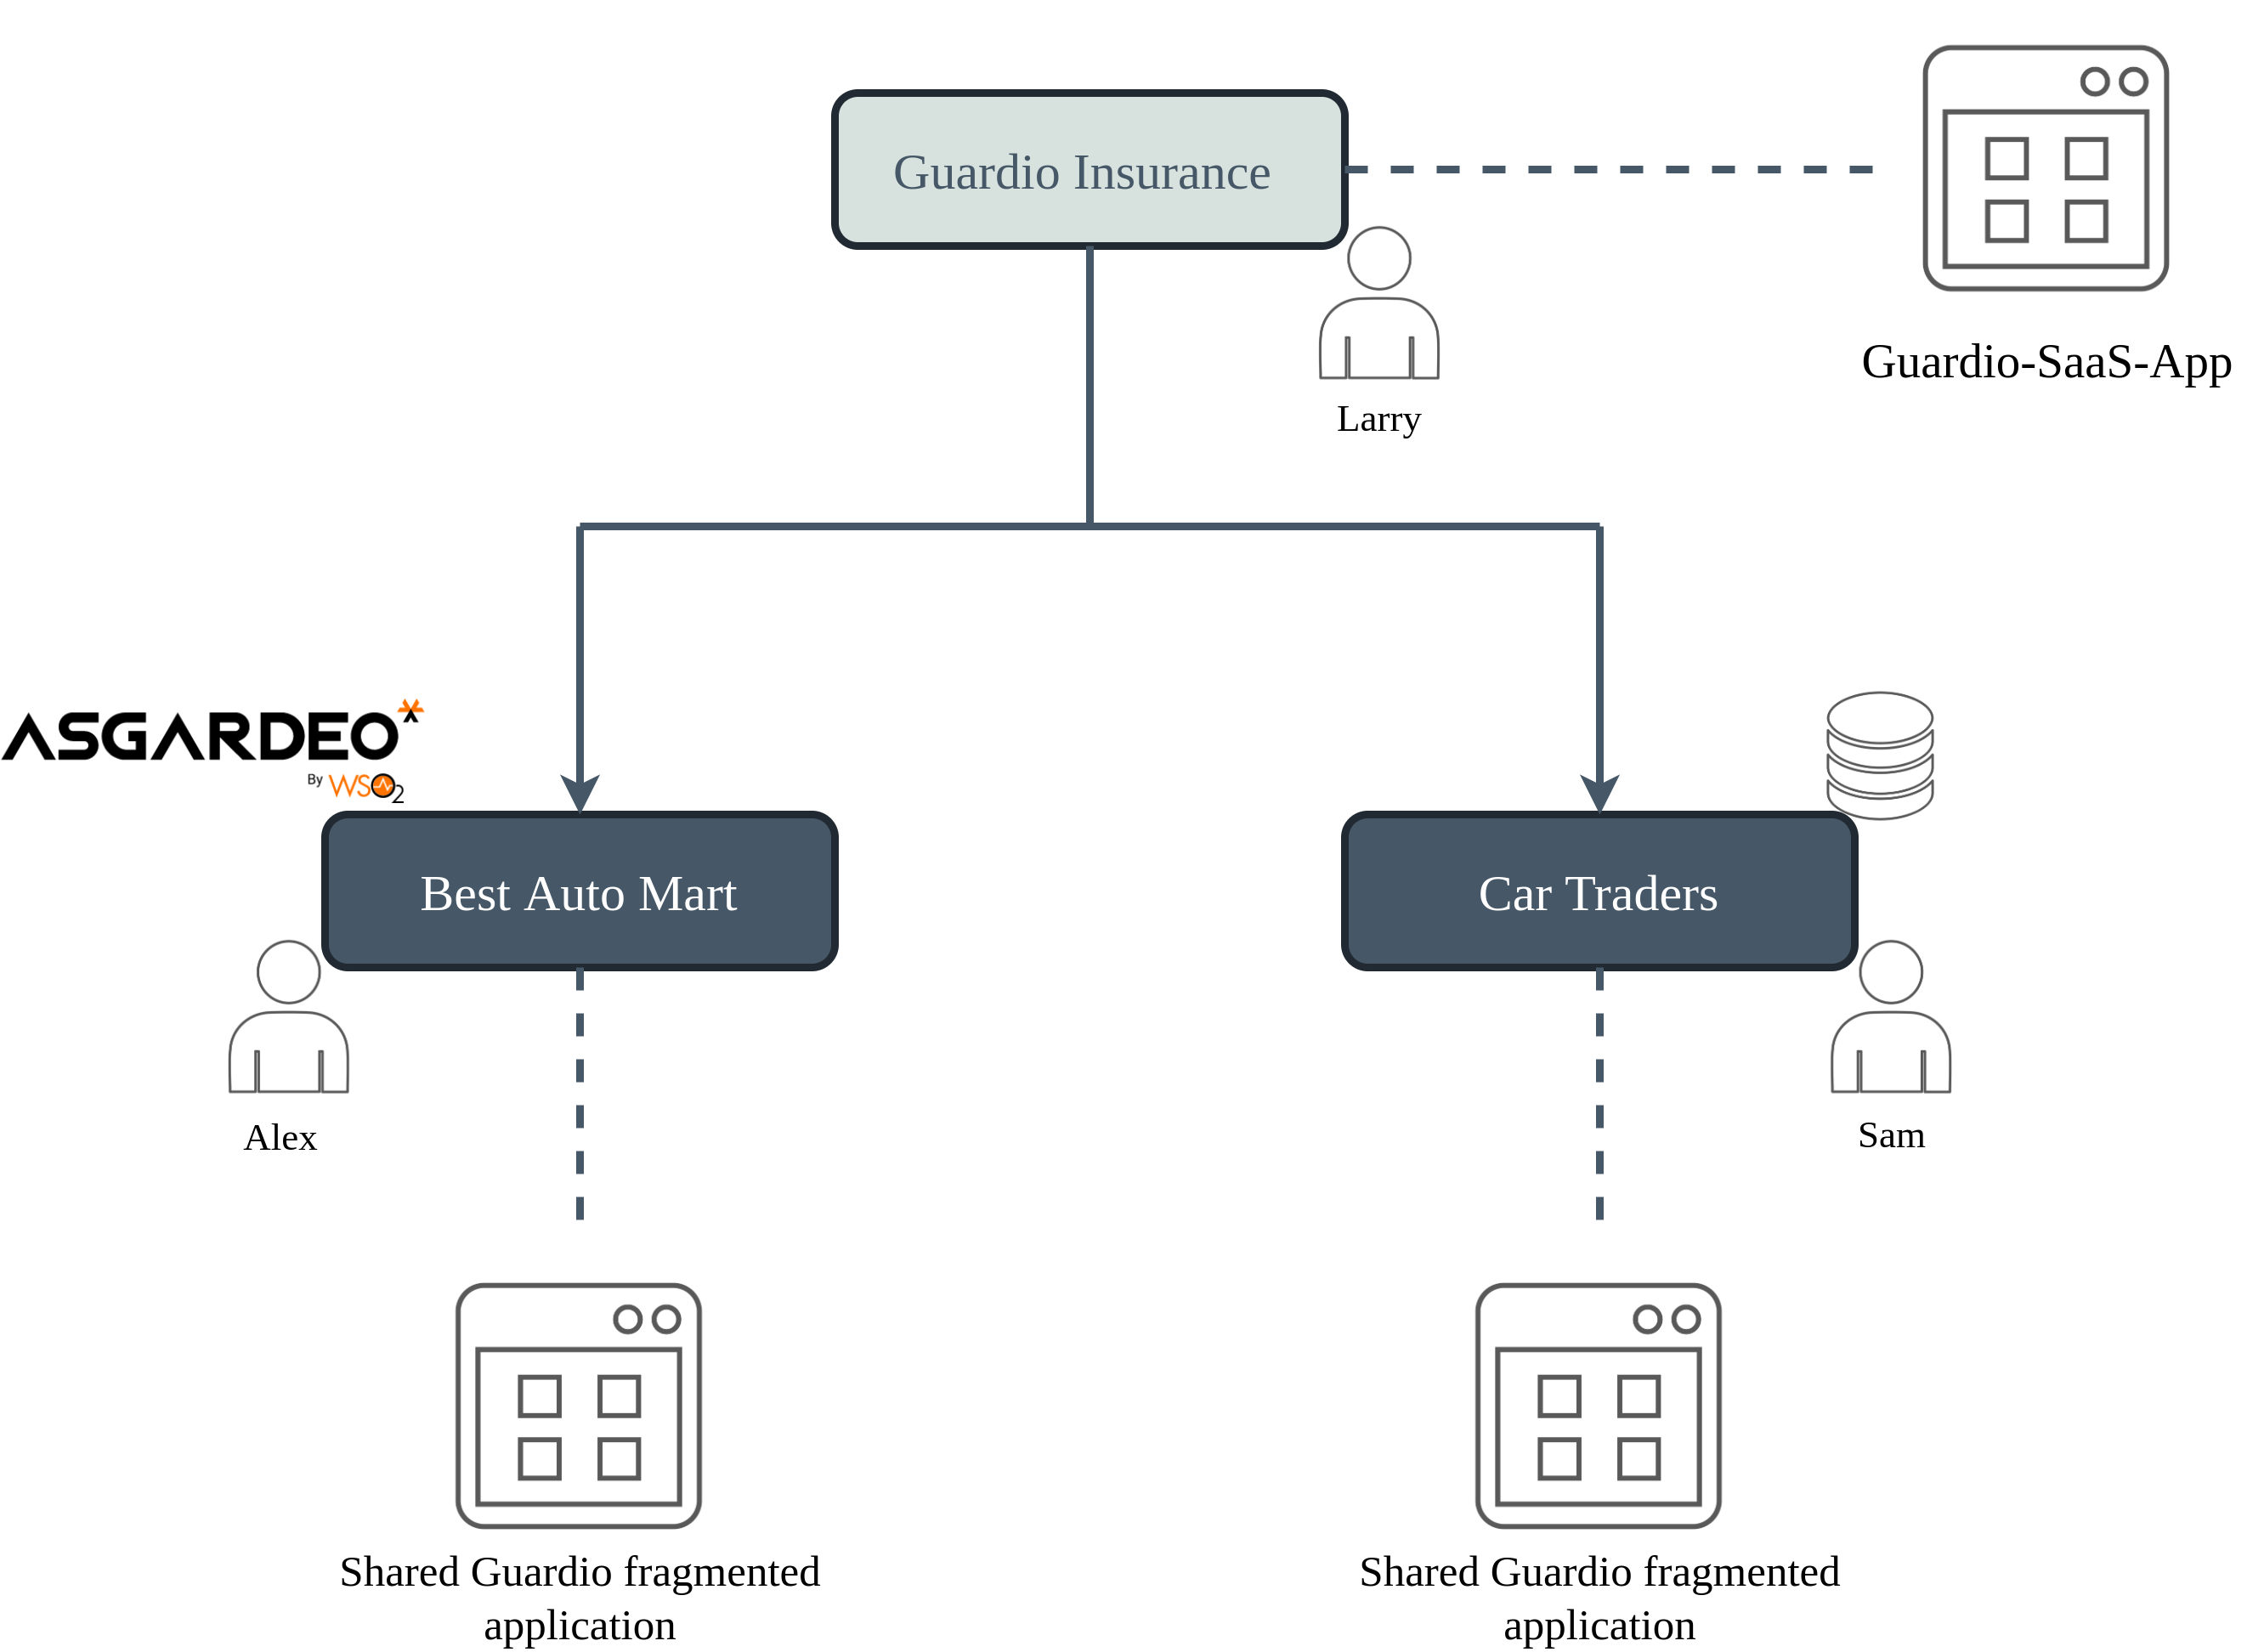
The administrators of the organizations are as follows:
- Guardio (super organization):
Larry - Best Auto Mart:
Alex - Car Traders:
Sam
Larry wants to perform the following tasks:
- Register a user in each sub-organization
- Provide a login option for the users to log in to the respective sub-organization IdP.
Step 1: Create the organizations
To create the sub-organizations:
-
Sign in to the super organization (
https://{SERVER_HOST}:{PORT}/console). -
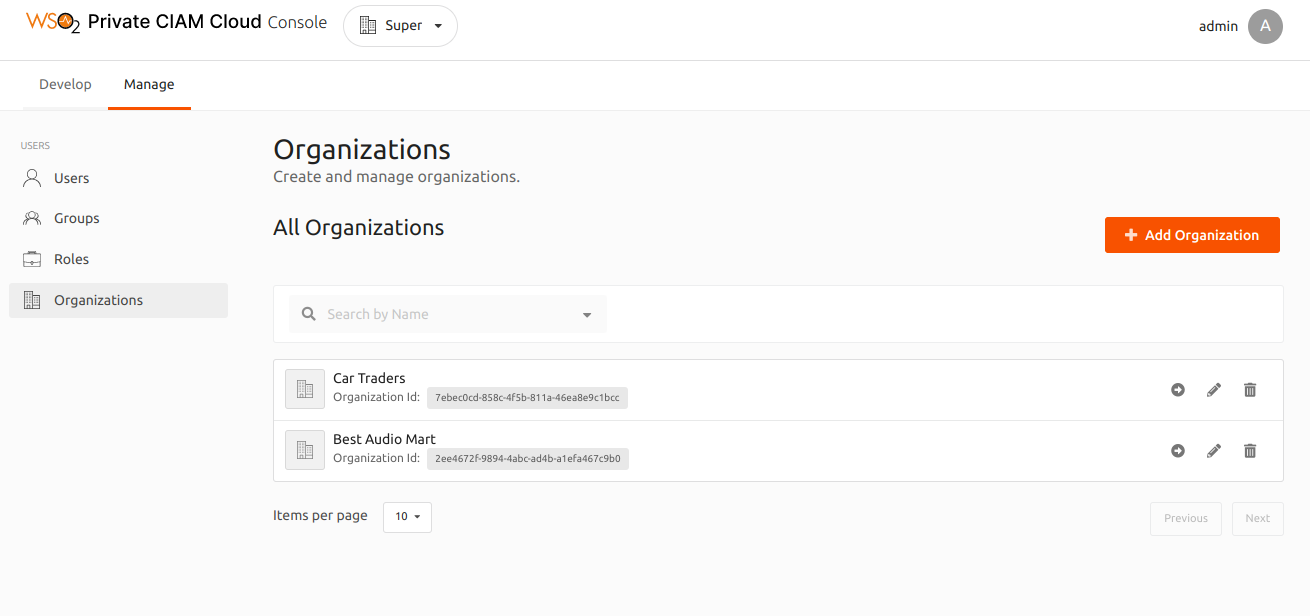
On the console, create sub-organizations with the following names:
- Best Auto Mart
- Car Traders
Step 2: Create a user and assign roles
You need to create new users on the sub-organizations with the required permissions.
-
To create a user for Best Auto Mart with permissions to create an IdP:
- Use the Organization Switcher to change the organization to Best Auto Mart.
- Create a user named
Alexon the Best Auto Mart organization. - Create a role with the required permissions to create an Identity Provider.
- Assign
Alexto this newly created Role.
-
To create a user for Car Traders with administrator permissions:
- Use the Organization Switcher to change the organization to Car Traders.
- Create a user named
Samon the Car Traders organization. - Create a role with the required permissions for an administrator.
- Assign
Samto this newly created Role.
Step 3: Configure the business apps
To configure the business applications:
- On the CIAM Private Cloud console, go to Develop > Applications.
- Click + New Application and select Standard-Based Application.
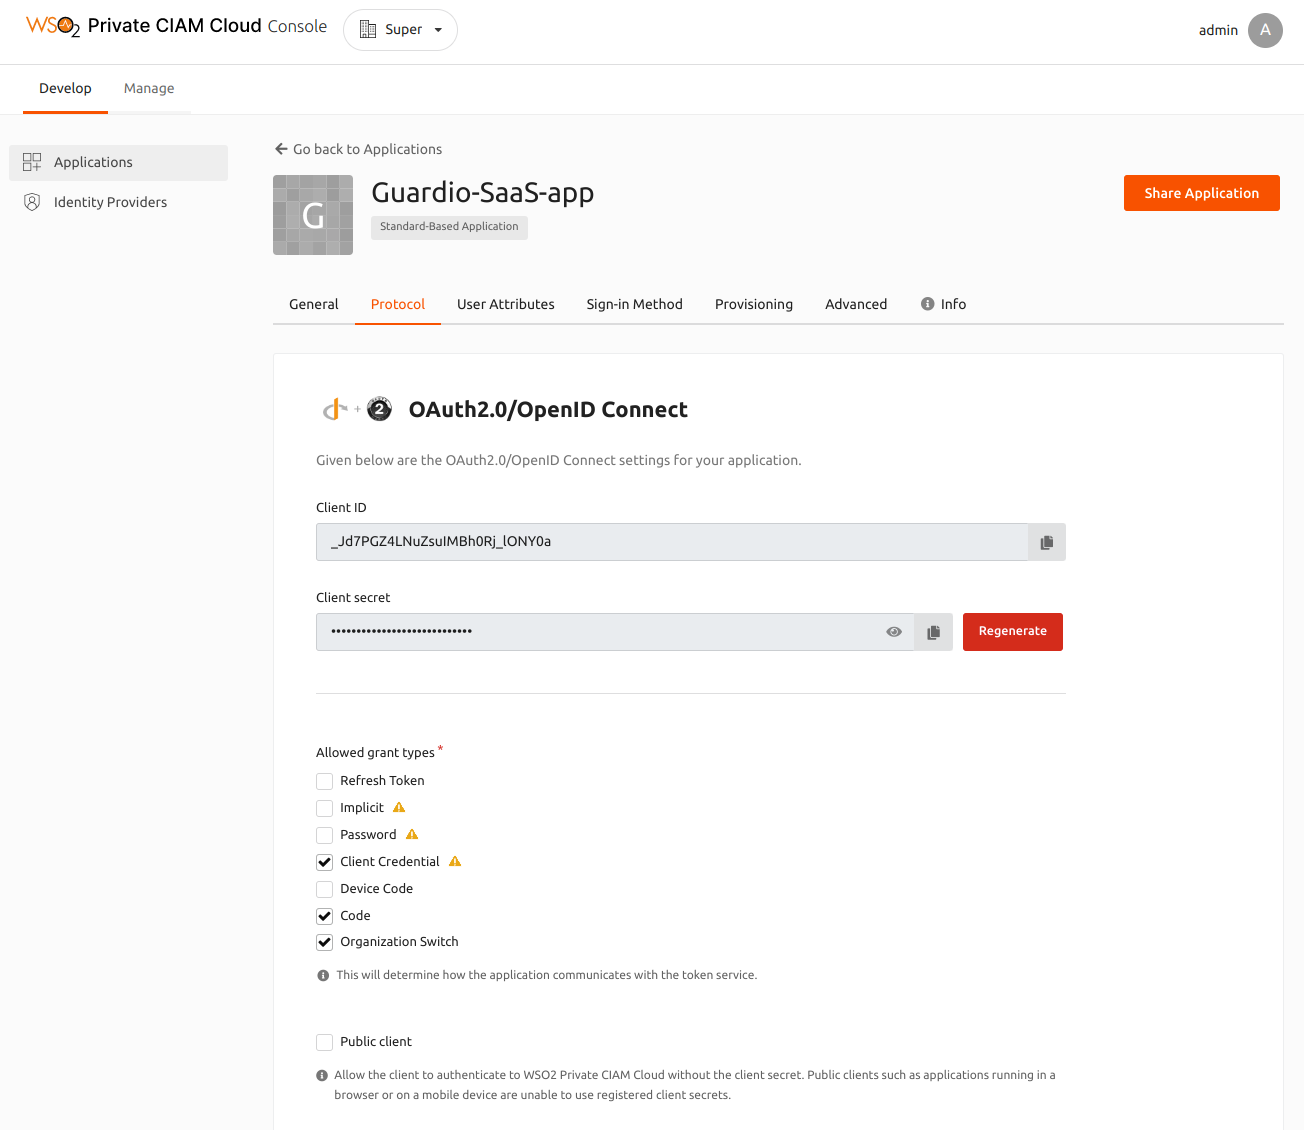
- Enter
Guardio-SaaS-appas the application name and selectOAuth2.0 / OpenID Connectas the Protocol. - Select Management Application, to allow the application to use Management APIs.
-
Click Register to create the new application.
Note
Note the OAuth client key and OAuth client secret that is generated. You will need them to set up the sample application.
-
On the Protocol tab, select the Allowed Grant types, and enter the following details:
Property Value/s Allowed Grant types Organization SwitchandCodeAuthorized redirect URLs http://localhost:3000/api/auth/callback/wso2isAllowed origin http://localhost:3000Organization Switch grant
The
Organization switchgrant is required when one user manages multiple organizations.According to the scenario, when Alex login to the Best Auto Mart using the Organization Login federated flow, the access token is issued against the Guardio insurance organization. But Alex wants to do operations in Best Auto Mart and needed an access token against Best Auto Mart. The
organization_switchgrant type is used to exchange the token he received for the Guardio Insurance for a new token for Best Auto Mart.For more information on
Organization switchgrant, refer Organization Switch Grant. -
Click Update to save the configurations.
-
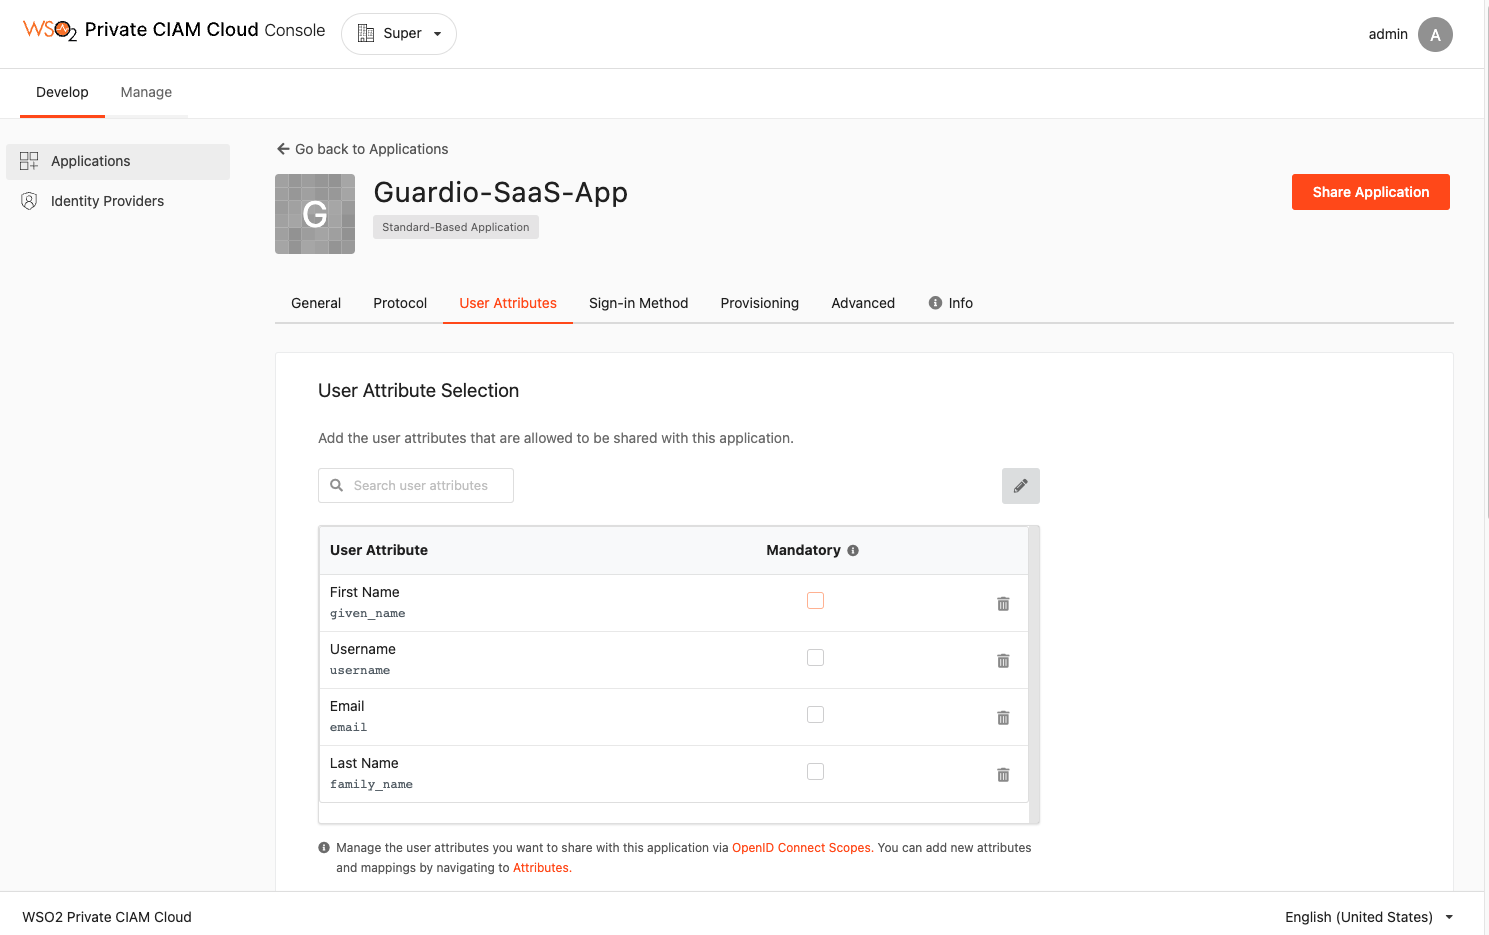
On the User Attributes tab, click on + Add User Attributes.
-
Select
Email,First Name,Last Name, andUsernamefrom the list of attributes.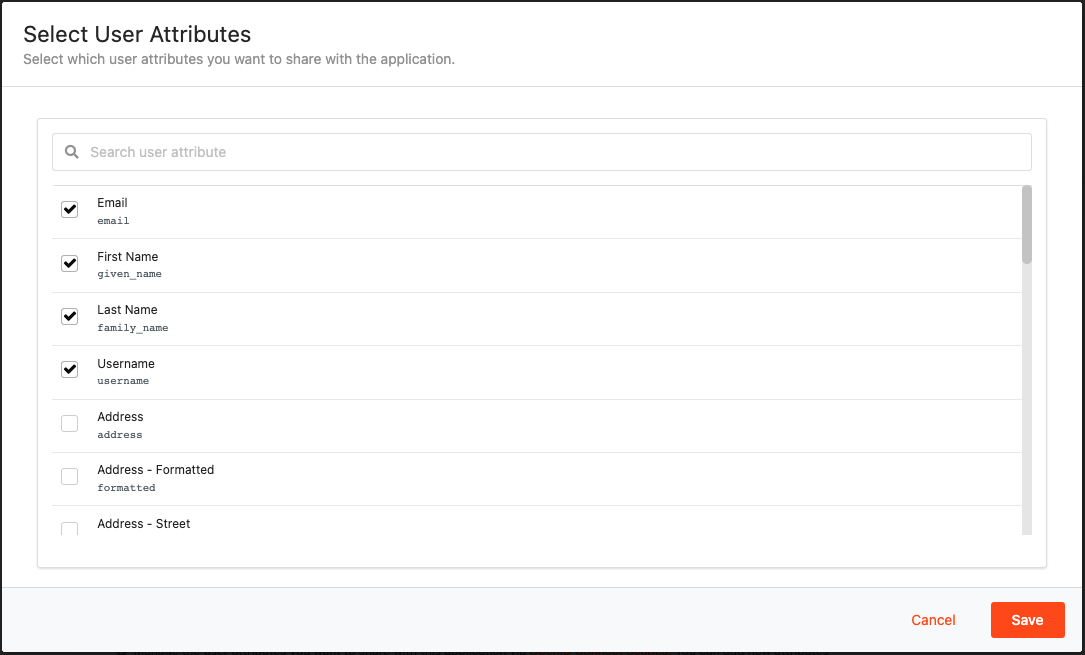
-
Click Save to add the user attributes and click Update to save all the configurations.
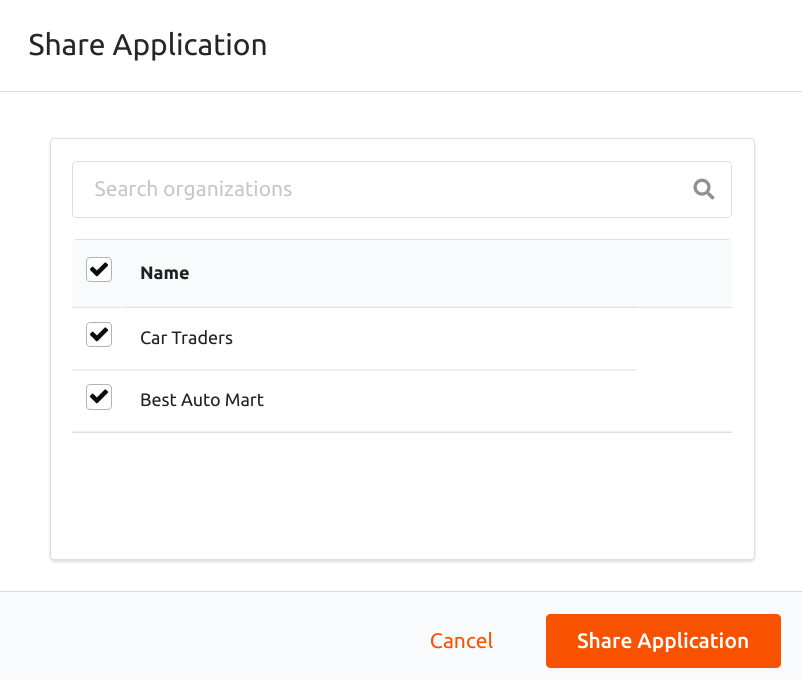
Step 4: Share the business app
Share the Guardio-SaaS-app business application with the other sub-organizations using the Share Application option.
Step 5: Configure the Sign-in method
After you share the application with the sub-organizations, an Organization SSO IdP named Organization Login will be automatically created and assigned as a sign-in method for the application.
To check if the IdP is assigned to the application:
- On the CIAM Private Cloud console, go to Develop > Applications and select
Guardio-SaaS-App. -
On the Sign-in Method tab, check if the generated Organization Login IdP has been assigned.
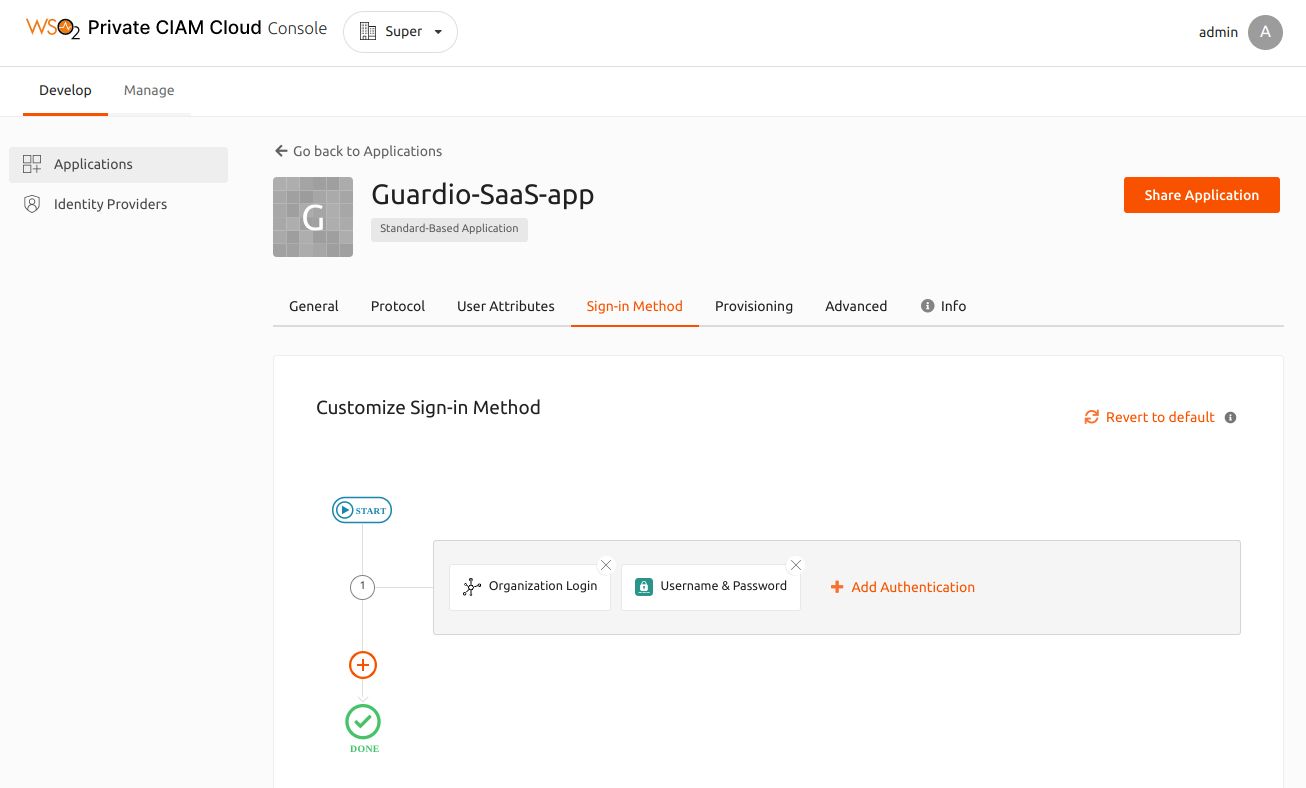
By default the Username & Password authentication step is added to the Sign-in flow. You can remove it from the sign-in flow of the application. By doing so, you will be directed to the created organization IdP for authentication.
Add additional authentication steps
For sub-organization logins, it is compulsory to use the Organization SSO IdP, as the user should select the organization that they wish to log in to.
In cases where the application is configured with two or more first-step authentication methods, the application must prompt the Organization SSO IdP authenticator for sub-organization users.
To enable this add the following script for conditional authentication and update the <ORG IDP NAME>.
var onLoginRequest = function(context) {
executeStep(1,
    {
        authenticationOptions: [{
            idp: (context.request.params.org && !context.steps[1].idp) ? "<ORG IDP NAME>" : context.steps[1].idp
        }],
        authenticatorParams : {
            common : {
                'skipIdentifierPreProcess' : "true"
            }
        }
    },
    {
        onSuccess: function (context) {
            Log.info("User successfully completed initial with IDP : " + context.steps[1].idp);
            if (context.steps[1].idp === "<ORG IDP NAME>") {
                return;
            }
        }
    });
};
Step 6: Onboard sub-organization IdPs
To onboard sub-organization IdPs, you need to configure an application on Asgareo and the IdP on the Private CIAM cloud.
-
On the Asgardeo console:
-
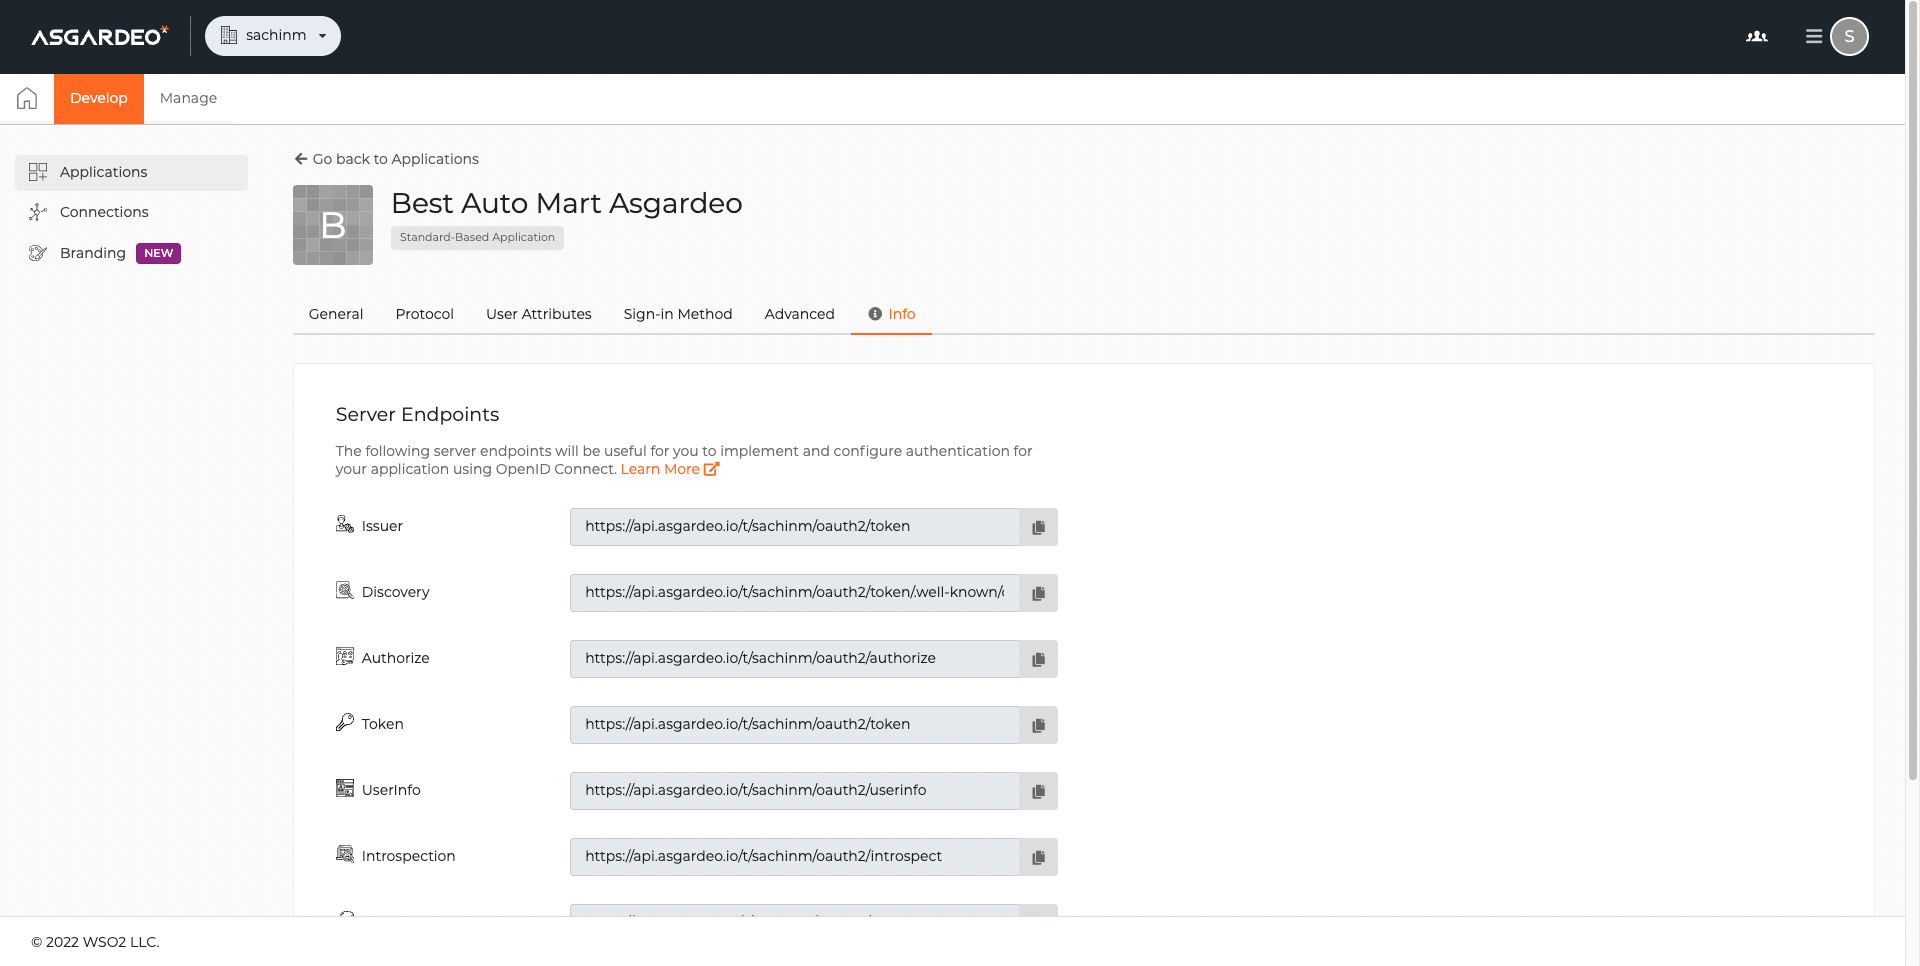
Obtain the
client idandclient secret. This is needed to create an IdP on the Best Auto Mart organization.
Info
Use the details on the Info tab of the application to create an OIDC-based IdP on the Private CIAM Cloud.
-
On Private CIAM Cloud Console:
-
Log in to the console as
Alex.Use
https://localhost:9443/o/<organization-id>/consoleas the Organization URL template to log in to the sub-organization. -
Create an OIDC standard-based IdP named
Asgardeo, for the users of the Best Auto Mart organization.Info
Use the details from the Info tab of the application made on Asgardeo to fill in the required fields when creating the IdP.
-
Go to the Develop > Applications and select
Guardio-SaaS-app, which was shared in Step 3. -
On the Sign-in Method tab, select the created
AsgardeoIdP as the first authentication method.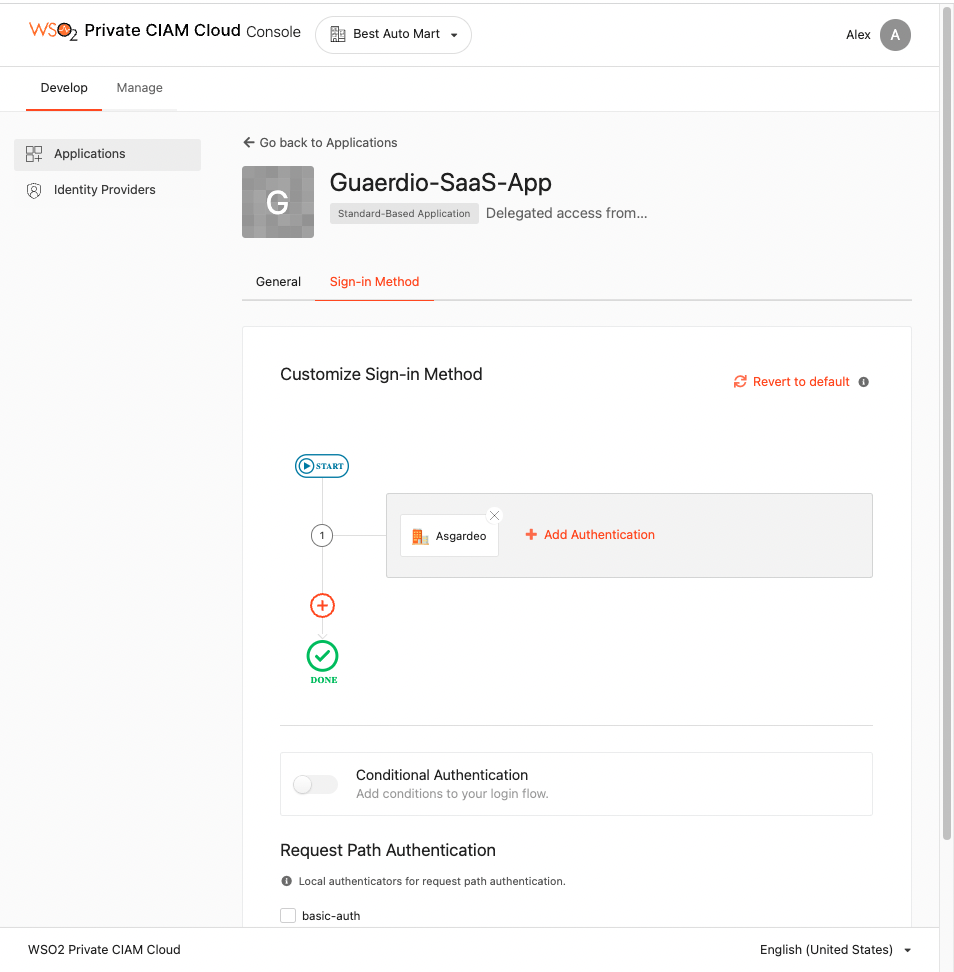
-
Click Update to save the configurations.
-
Step 7: Deploy the sample app
To set up the sample application:
-
Download the sample application, and extract the content of the zip file.
-
Open the
config.jsonfile found in the<SAMPLE_APP_HOME>/guardio-insurance-sample-application-maindirectory and update the following properties:Property Description WSO2IS_HOST The URL of the Identity Server. WSO2IS_TENANT_NAME ID of the organization where the created application resides.
Default value for this property iscarbon.super.WSO2IS_CLIENT_ID The client ID obtained when creating an application on the Identity Server Console. WSO2IS_CLIENT_SECRET The client secret obtained when creating an application on the Identity Server Console. SAMPLE_ORGS The details of the organization.
id: ID of the sub-organizations using this shared application."WSO2IS_HOST": <Identity Server URL>, "WSO2IS_TENANT_NAME": carbon.super, "WSO2IS_CLIENT_ID": <APPLICATION CLIENT ID>, "WSO2IS_CLIENT_SECRET": <APPLICATION CLIENT SECRET>, "SAMPLE_ORGS" : [ { "id" : <Best Auto Mart Organization ID>, ... }, { "id" : <Car Traders Organization ID>, ... }, ]Info
If the created application resides in a different organization, replace the
WSO2IS_TENANT_NAMEvalue with the respective organization ID.
Try it out
To try out this application:
-
Open a terminal, navigate to
<SAMPLE_APP_HOME>/guardio-insurance-sample-application-mainfolder and run the following commands to start the application:Info
To complete this step, it is required to have a node installed on your machine.
npm install npm run dev -
Enter
http://localhost:3000on your browser to access the application. -
Click Sign In to proceed with the application.
-
Select your organization from the list and click Next. In this example, we will select
Car Tradersas the organization.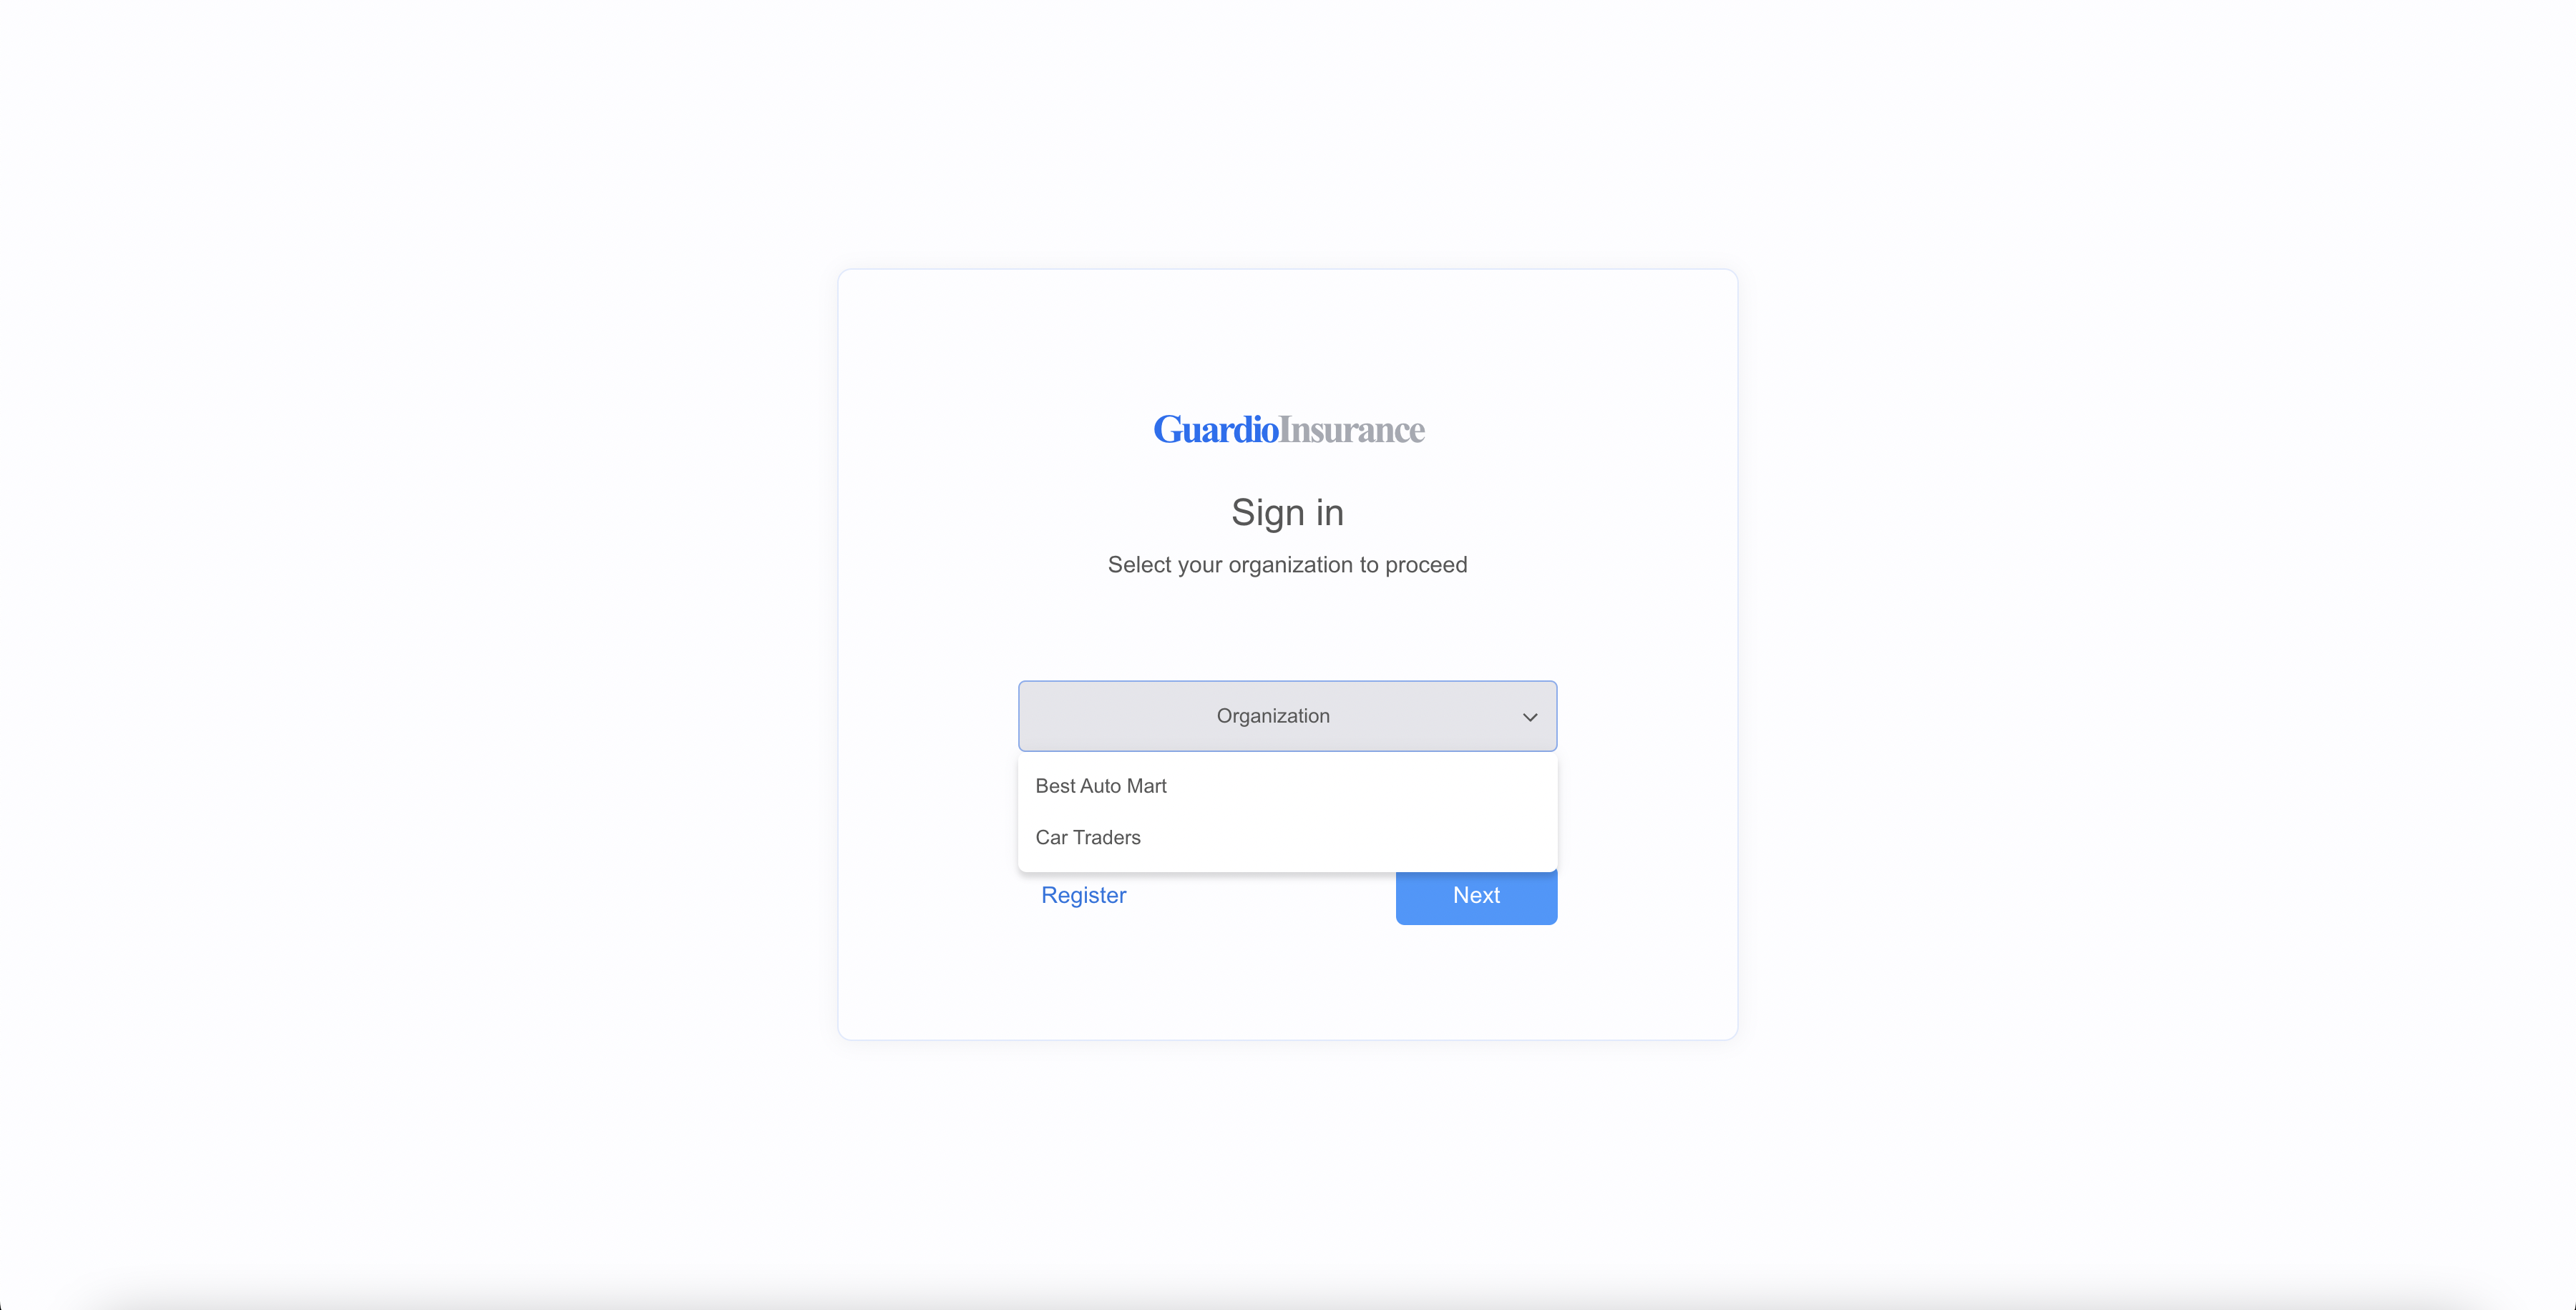
-
Enter the user credentials and click Continue to log in to the application. You will be successfully logged in to the sample application.
-
Logout of the application, select
Best Auto Martorganization and try to log in. You will be redirected to the Asgardeo login page.